This document covers the least exciting aspect of Android mobile app security testing, configuring the testing environment. It is both time consuming and an extremely important part of the assessment process to get right. This guide covers setup of GenyMotion with Burp Suite on Mac OS, but it should be trivial to replicate on Linux or Windows.
Install GenyMotion
GenyMotion is the android emulator of choice for dynamic android app security testing.
Installation on mac requires Virtual Box to be installed first, then run through the GenyMotion installer.
- Install Android device (Nexus 4 works well)
- Select Android 8.1 and deploy
Setup Burp Proxy with GenyMotion
If you are using DHCP you may want to statically assign an address, as the IP randomly changing requires this process to be completed again (which can get extremely annoying…).
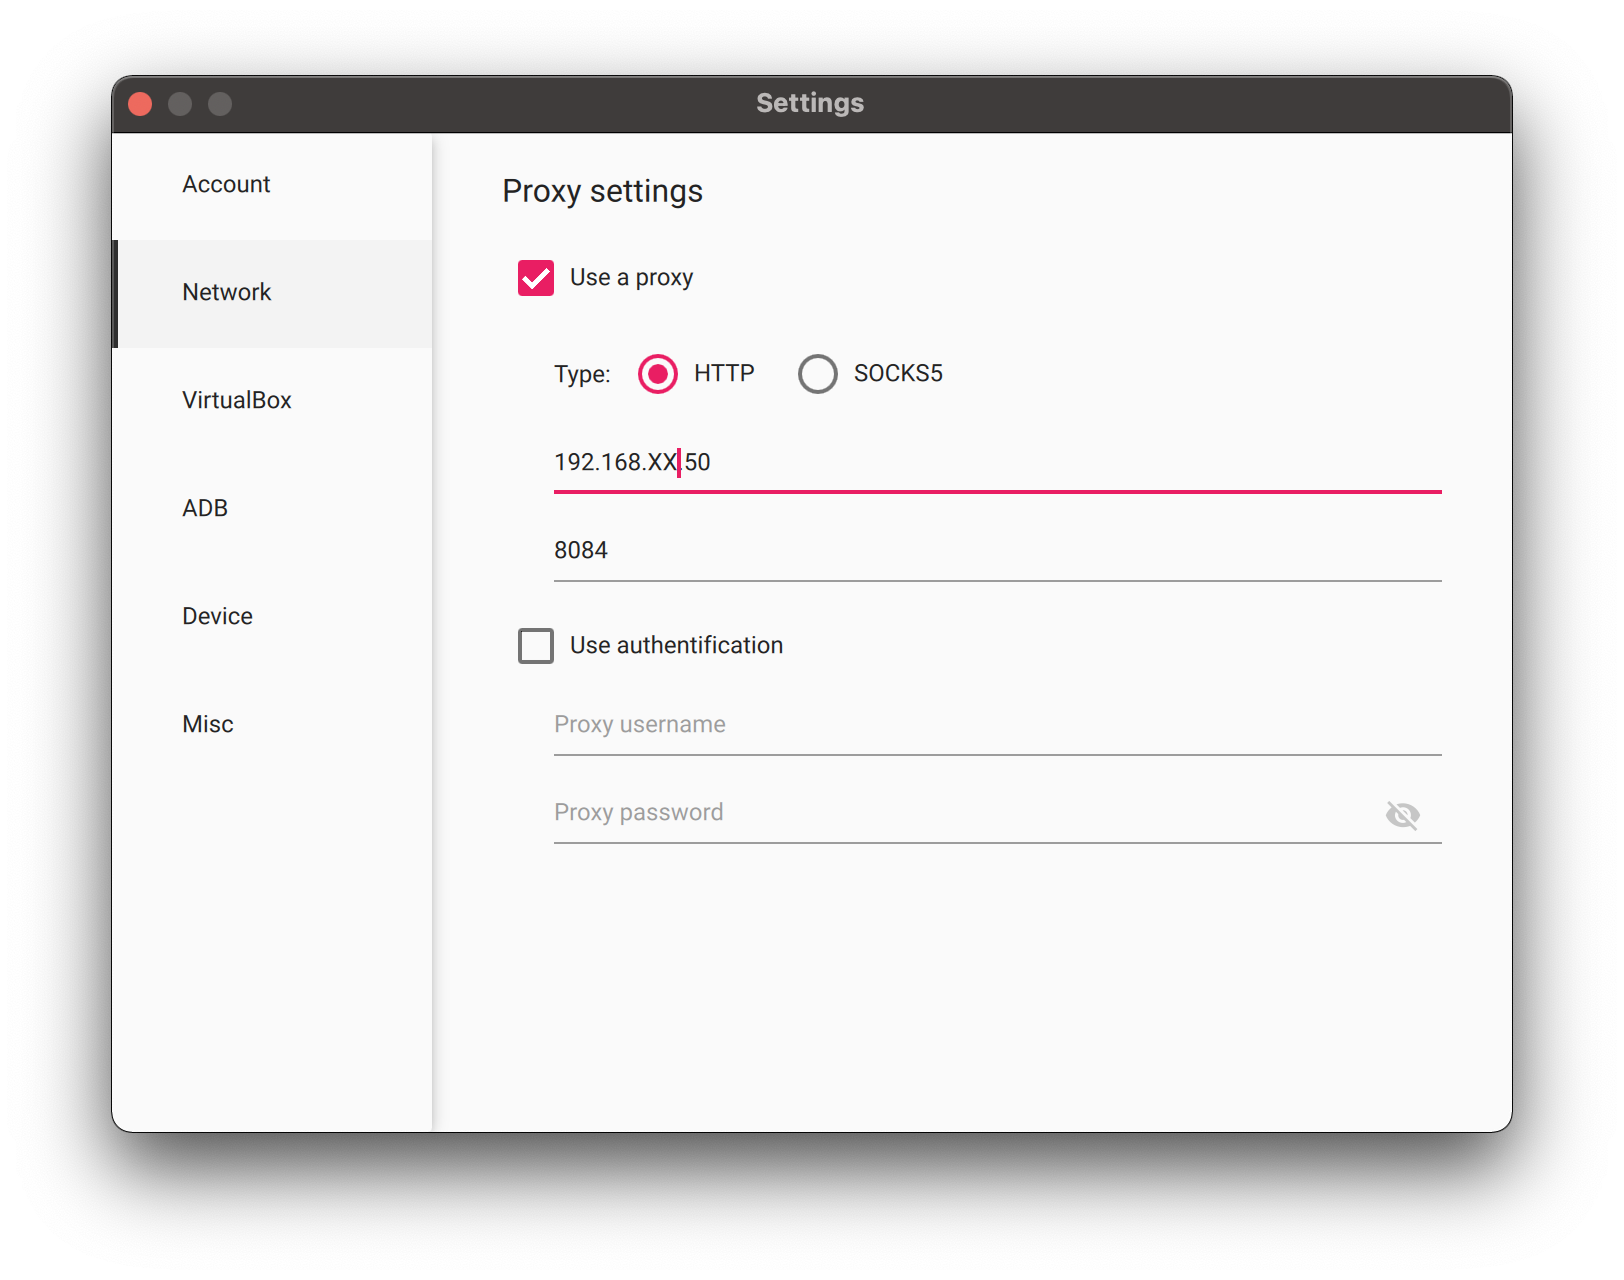
1. GenyMotion Burp Proxy Settings
- Select GenyMotion
- Preferences
- Network
- Proxy Settings and tick HTTP and add your local interface address and a different port to one that Burp is using

2. Android 8.1 Proxy Settings
- Swipe down the top and select Settings
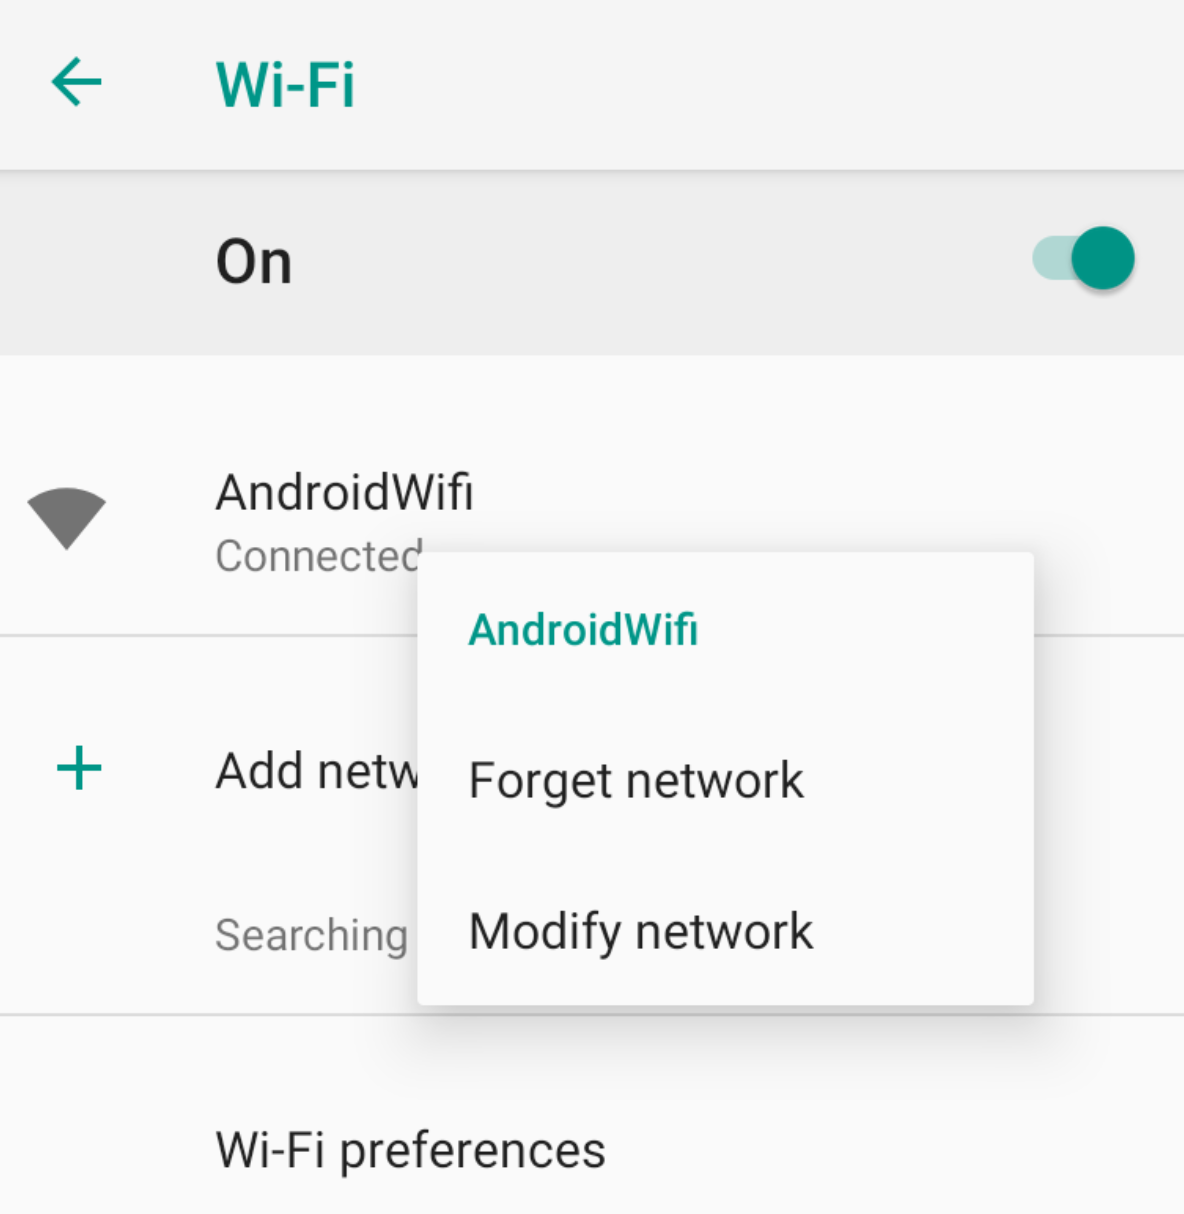
- Tap Network & Internet > Wi-Fi > Long Tap on the connected Wi-Fi network and Select Modify Network
- Tap Advanced > Proxy > Manual and enter the same Proxy settings you entered in step 1

3. Android Burp Certificate Installation
- Go to your web browser and download the certifcate file from http://burp
- Rename it to .cer
- Drag it into the running GenyMotion phone (this will place the file at /sd-card/)
- On the phone go to Settings > Security & Location > Encryption & Location > Install from SD card (Install certificates from SD card)
- Click Downloads on the left and select the .cer file
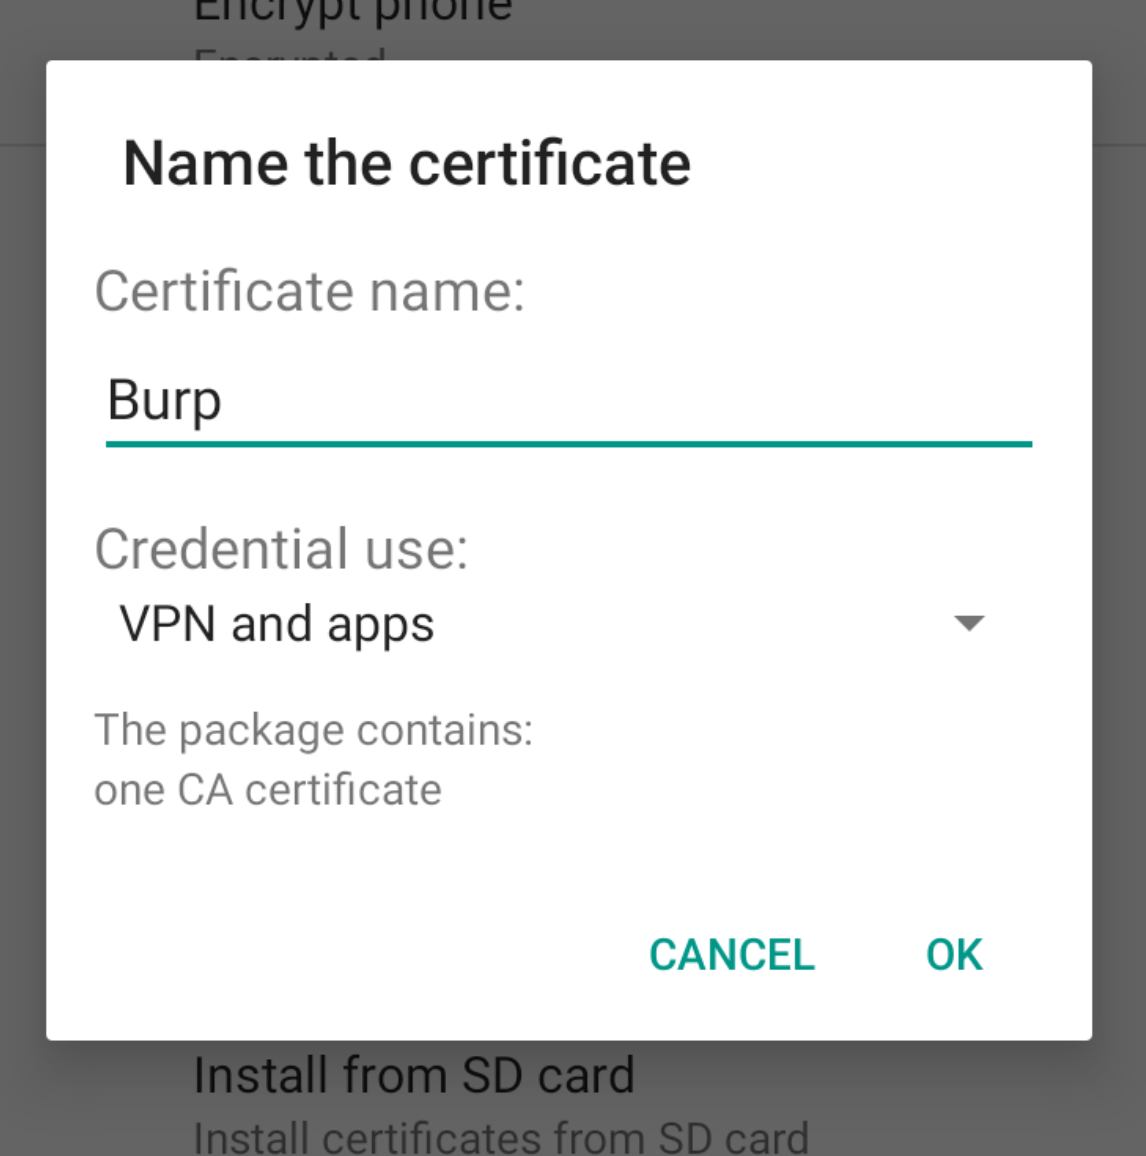
- Install the certificate and call it Burp

- You will need to set a pin code, set one
4. Burp Proxy Settings
Add a Burp proxy on the interface with the IP and port used at step 1
5. ADB
- Install brew
brew install android-platform-toolsadb devices
List of devices attached
192.168.XX.XXX:5555 device- adb shell
vbox86p:/ # lsYour id should be root on GenyMotion.
6. Installing APK FIles
There are two options for installing APK files, using adb or dragging and dropping.
Using ADB:
adb install file.apkOr drag and drop the apk file into the running GenyMotion Android device.
7. ADB Basic Commands
Installed Android application location:
cd /data/dataFor a more in depth guide on how to use ADB see our ADB commands cheat sheet here.
8. Open GApps
If you are assessing an application from the Play Store then you can install open gapps in GenyMotion by clickin on the icon on the right hand menu.
Enjoy.
